This guide will take you through the steps required to set up automatic requests via email and SMS.
Setup #
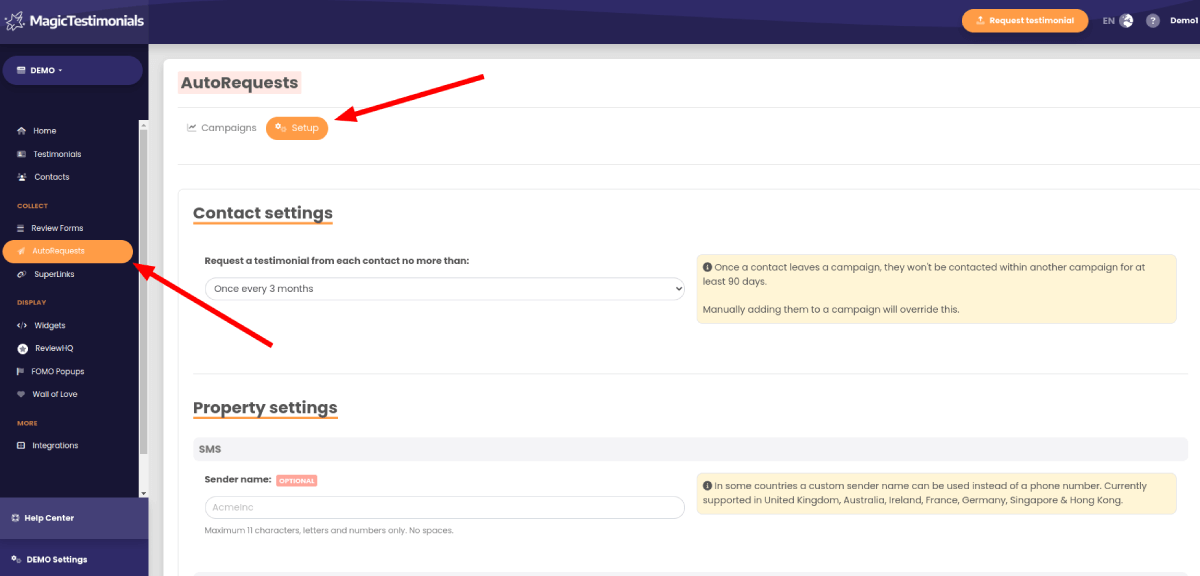
First, go to the Autorequests page. You can open it if you click on “Autrorequests” in sidebar. Next up, click on the setup button to configure some general settings.
Contact settings #
Here you can change how frequently you request a testimonial from your contacts.

Property settings #
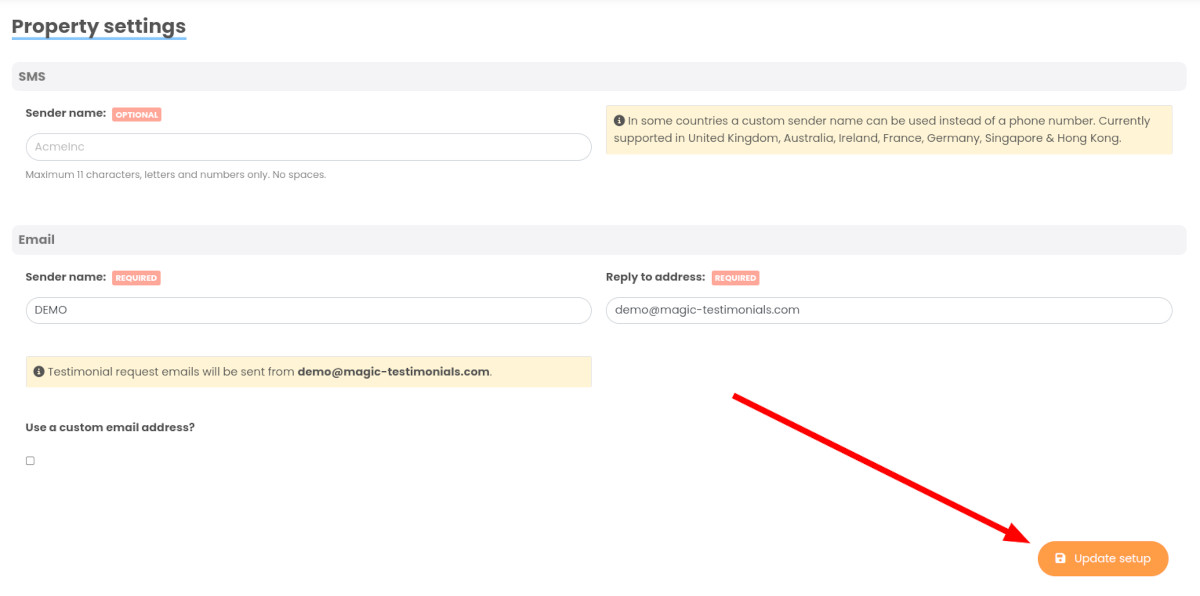
Here, you can change different settings regarding sender name and address.
If you want to use the custom email address, mark the “Use a custom email address” checkbox and enter the email address to send from. After that, click on the “Save and verify address” button. You’ll get an email which will contain a link to verify your email address. Click on that link to verify your email address. If you didn’t get that email, wait 5 minutes and click on the link to resend it.
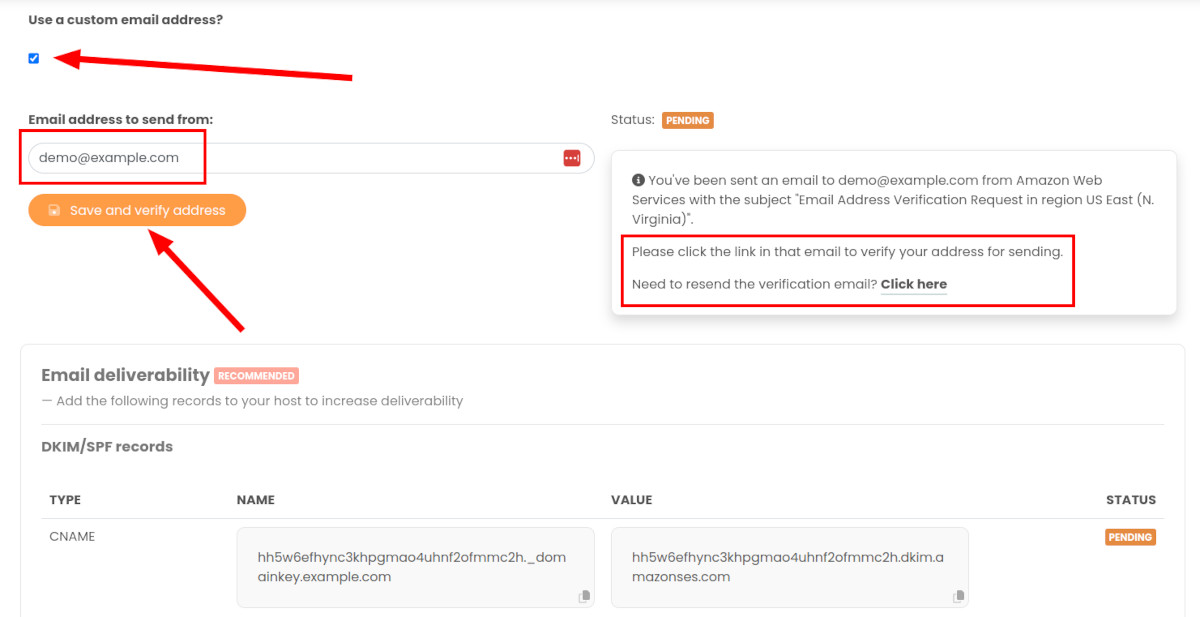
To improve your email deliverability, add the DKIM and SPF records to your DNS management service.

For example, if you use Cloudflare, this is how the first DNS record from this example is going to look like:

Click the “Save” button to save that DNS record.
Add the second and third DNS record the same way as you added the first one.
The fourth record is an SPF record and it’s a little bit different. To add that one, enter the @ symbol as the name or only your domain name (without the @ symbol), so in this case “example.com”. This is how your SPF record should look like:
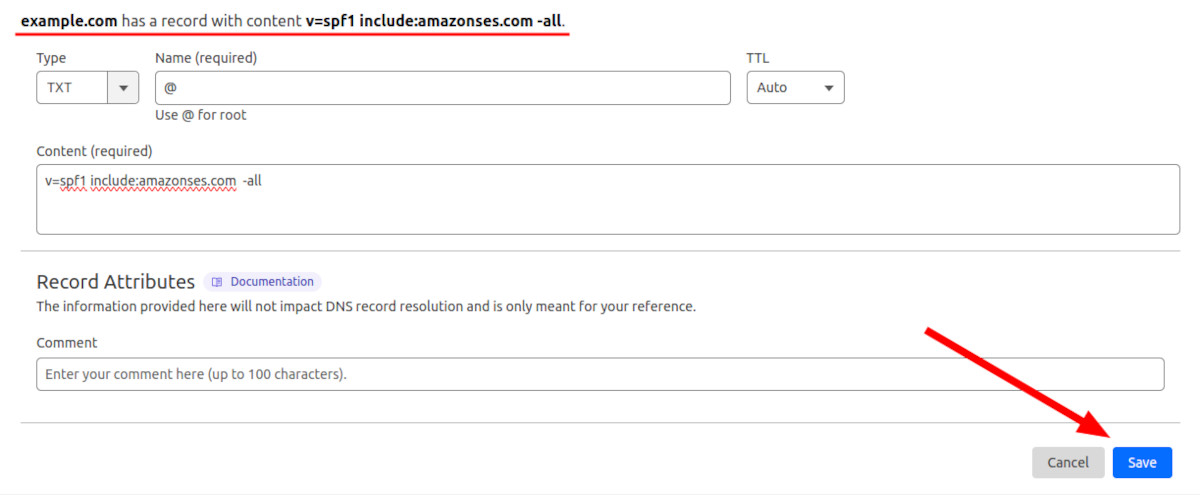
Click the “Save” button to save that DNS record.
*If you already have the SPF record, you’ll need to merge the one from the Magic Testimonials Display App into the existing SPF record. To do that, you need to add the include:amazonses.com before the “all” mechanism. For example, if your existing SPF record looked like this:
v=spf1 a include:spf.protection.outlook.com -all
your new one should look like this:
v=spf1 a include:spf.protection.outlook.com include:amazonses.com -all
If still you need any help, contact us or take a look at the example in MailerLite’s help article.
Click the “Update setup” button. If you did everything correctly, the status should change to “Active”.

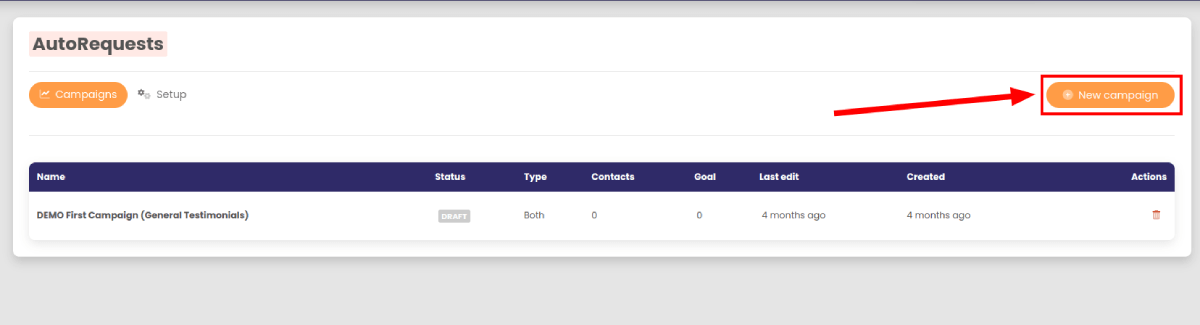
Once satisfied with general settings, click on “New campaign” to create a new AutoRequest.
AutoRequest Creation #
Objective #
First thing you will have to choose if your objective, what kind of testimonials do you want to collect. 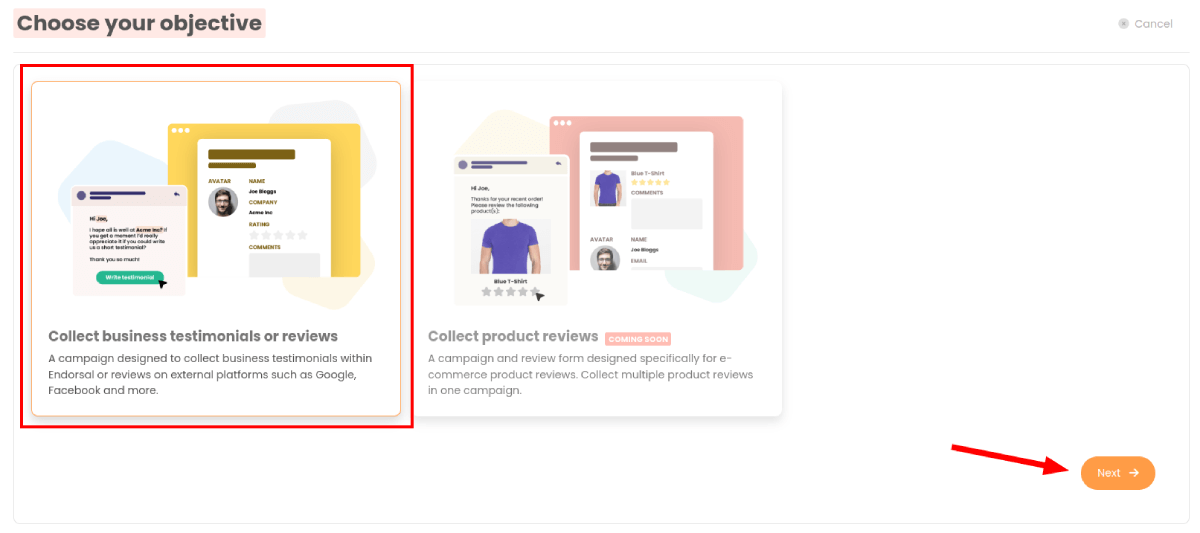
Campaign name #
Next up you have to name your AutoRequest campaign.

Campaign type #
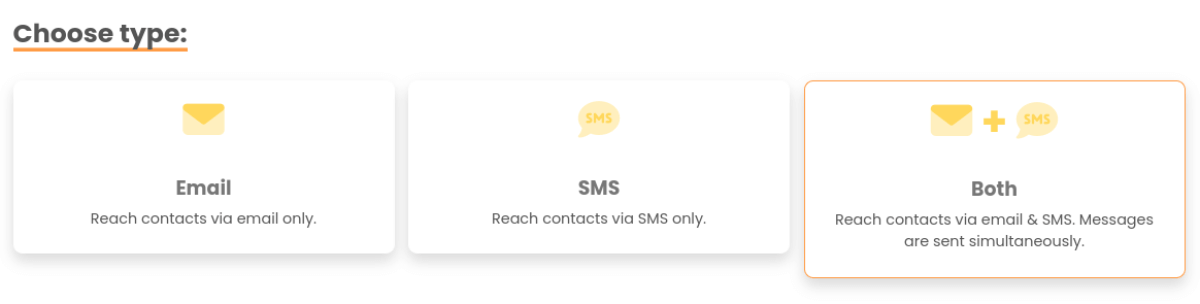
After naming your campaign, you are presented with 3 options. Here, you can choose to send only emails, only SMS or send both.
Review Form #
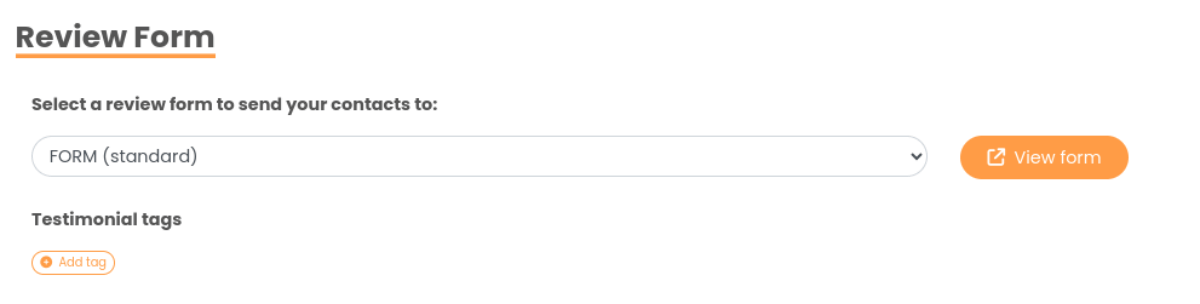
In the next field you need to choose what form you would like to use for this campaign.
Schedule #
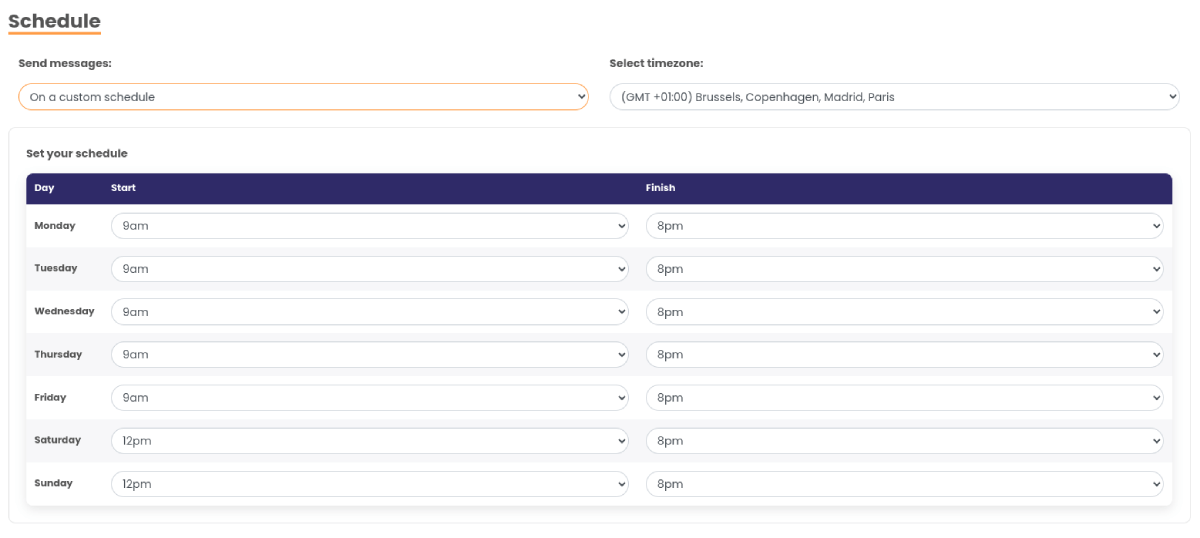
Messages can be sent on a daily, weekly, monthly or custom schedule.
Contacts #
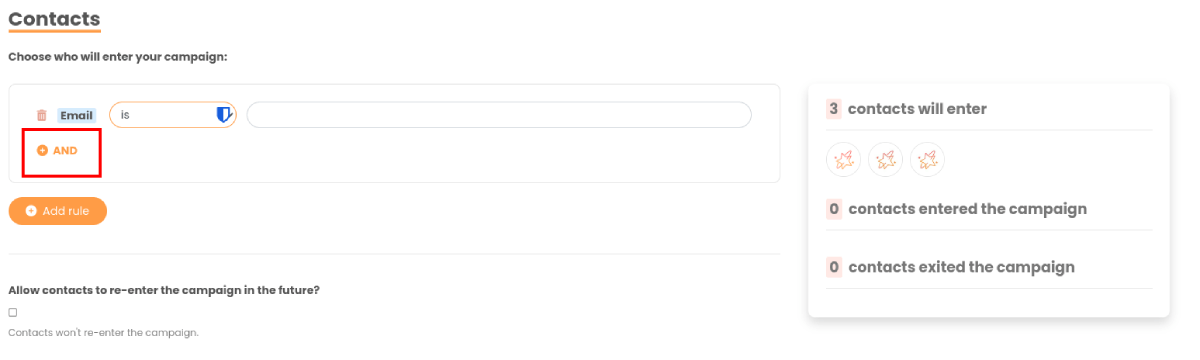
Here, you can add rules to include or exclude contacts if you don’t want to send them to all of your contracts.
Messages #
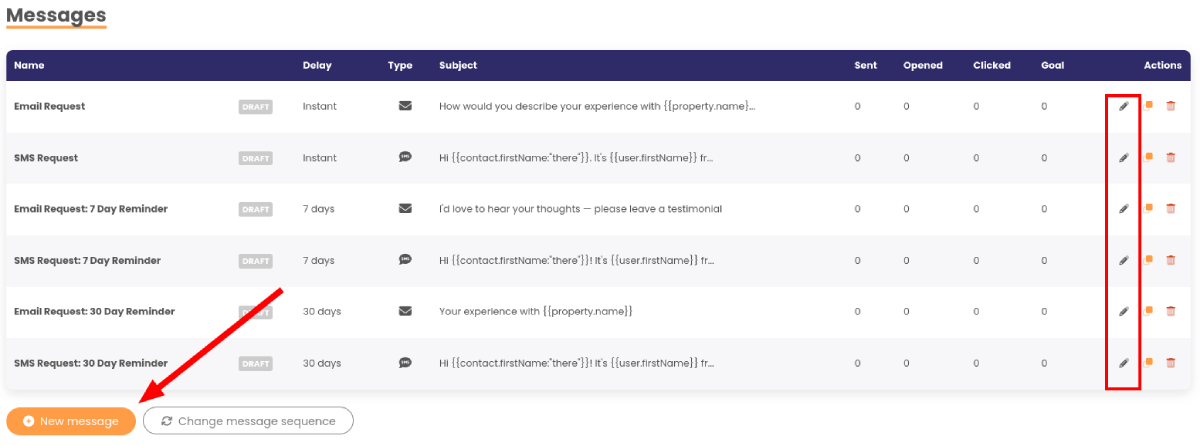
Presented with a set of templates, choose if you want pre-made messages or if you want to create your own.
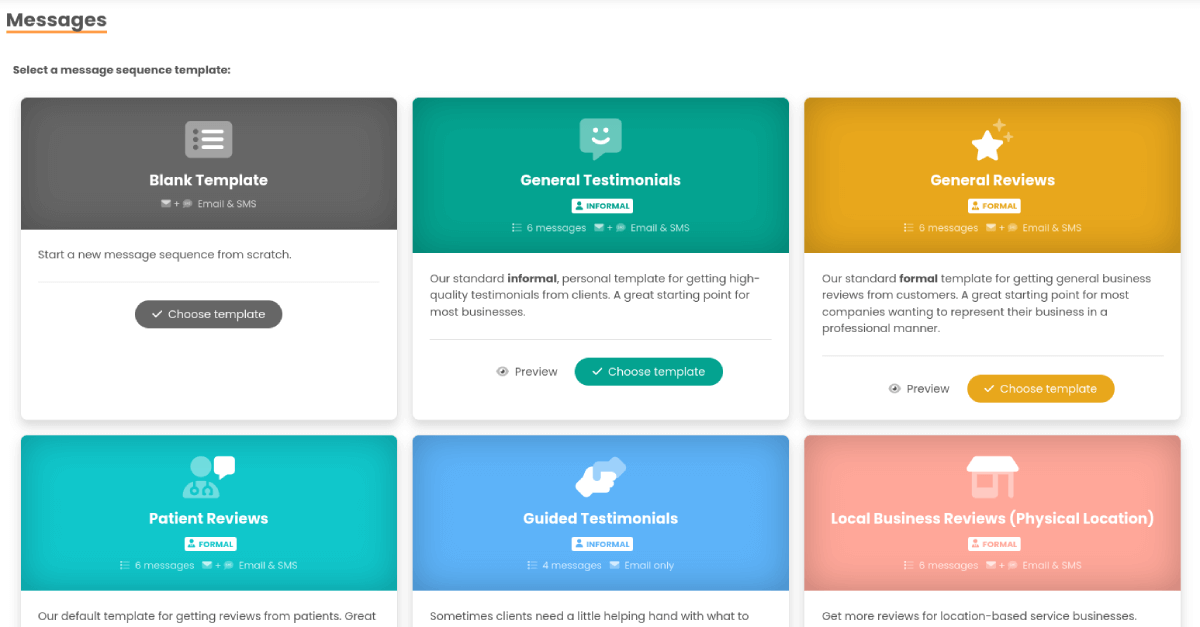
Once a template is selected, you can either create new messages or edit already existing ones.
You can choose the name, delay, type and subject of the message.
Go live #
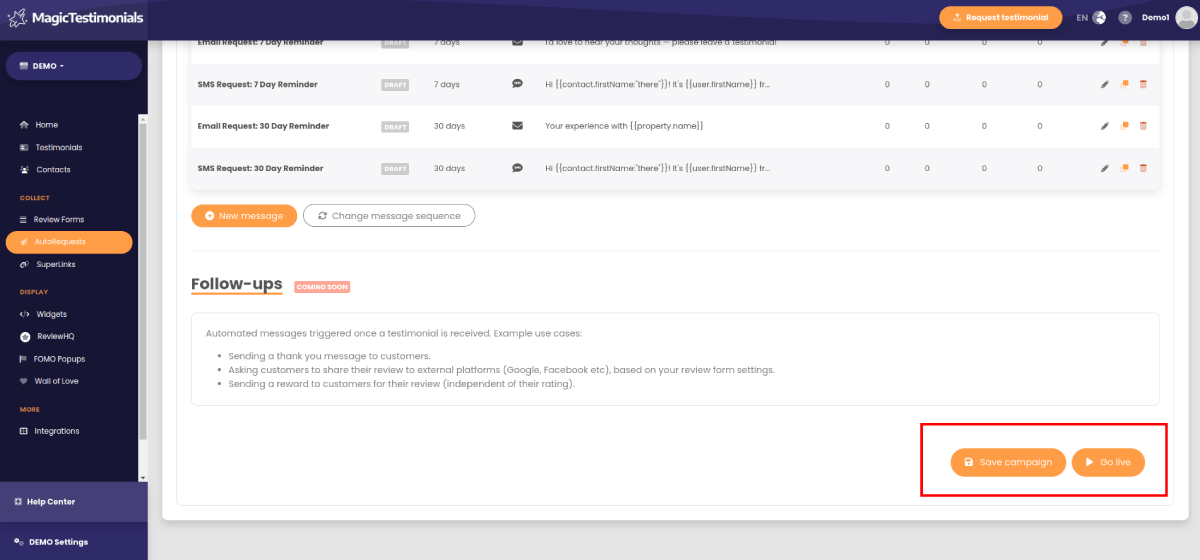
If you haven’t finished creating or are not satisfied with your campaign, click on “Save campaign” button to save it and have the possibility of continuing later on.
Once happy with all the settings of your campaign, click on “Go live” button.